Photo: missysueblog on Instagram
With flirtatious and fresh rope braids making a splash everywhere as hairstyling lovers prepare for spring flings and blossoming petals, the classic schoolgirl plait has officially received an update. If you’re wondering how to adorn your locks this Spring 2016, take your inspiration from the various iterations of the effortless rope braid. Here’s how to master this hair trend at home, with an upswept twist for an elegant finish.
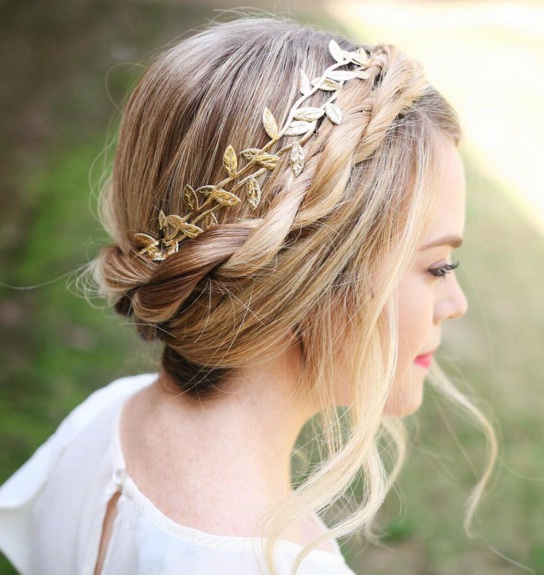
1) Start off by parting your straight and sleek locks: To launch your hairstyle, use a wide-toothed comb to divide your straight and tangle-free locks into a side parting. Next, separate your locks into two sections, and create a low side ponytail with a surrounding low ponytail directly underneath it.
2) Style one of the ponytails into a low braid: In order to bring your look to the next level, plait one ponytail into a sleek low braid. Leave a few face-framing strands of hair falling free by your visage to lend an innocent, ethereal touch.
3) Braid the other ponytail and create a second plait: Next, take the leftover ponytail and start braiding this into an accompanying low plait. At this point, you should have two low braids falling straight down your back.
4) Twist the two plaits around your head to craft a crown braid: Once you’ve perfected your two braids and fastened them in place with elastic bands, start wrapping both braids around your head. Create a crown braid by twisting the two sections, and tuck the ends of the braids underneath your crown. Use bobby pins to hold your newly crafted crown braid in position, and gently curl your face-framing tendrils for a sweet and truly bohemian look.