Master The Rope Braid Hairstyle In 5 Steps
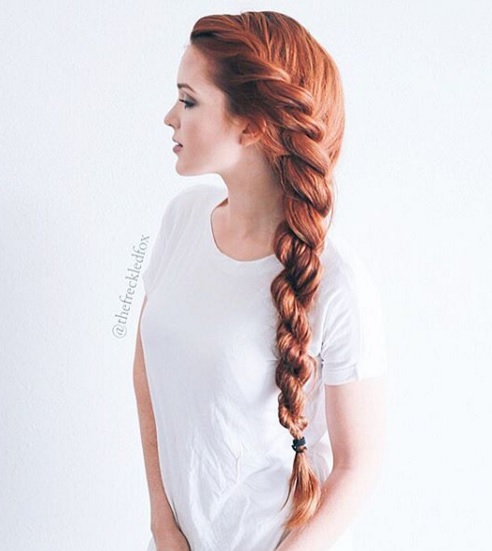
Photo: thefreckledfox on Instagram
With all the variations of the classic braid making a splash in the hairstyling world, it’s safe to say that the plaited pigtails of your youth are a distant memory. If you’re looking to update your usual fishtail braid for a chic alternative which brings the flowing locks of Rapunzel to mind, you may want to try the rope braid. Here’s an easy hair tutorial which will help you embrace the look this season.
1) Start off by spritzing your tresses with dry shampoo: Before you begin crafting your impeccable braid, prepare your strands by spraying dry shampoo. If you’re working with second day locks, dry shampoo can help eliminate unwanted greasy residue or an oily scalp. Use your fingers to work the shampoo through your strands, and carefully brush your locks with a paddle brush.
2) Begin braiding a thin segment of hair near your face: Once your locks are smooth, take a thin, face-framing section of hair on one side of your visage. Next, braid this segment against one side of your head.
3) Integrate this section into the rest of your hair: Continue plaiting the rest of your locks into one thick side braid, and carefully incorporate the side-braided section into the larger braid. This should bring a textured, voluminous effect to your locks. As you work through your locks, twist the ends of your hair to produce a heavy, ropelike effect.
4) Add texture to your hairstyle: After you’ve fastened your rope braid with an elastic band, texturize your hairstyle by gently pulling strands near your crown loose. Continue to bring your fingers through your rope braid, as you loosen sections where needed for a natural, bohemian finish.
5) Finish off with hairspray to maintain your look: Lock in your gorgeous new hairstyle with a spritz of hairspray to keep your braid in place. Use high hold hairspray if you have naturally thick or long locks, and enjoy your new look!